Boost your daily development cycle!
By using the right tools the right way, you can shorten your development cycle. IAR Embedded Workbench is well-known not only for its high performance, but also for providing smart features that make your work easier. But are you making use of all those features? In this article of tips and tricks, we’ll show you seven techniques that are useful to boost your daily development tasks.
Using Make & Restart Debugger
You probably often see the need to modify source code while you are debugging. You probably also already know that you can modify source code directly in the debug session, but that change will not be reflected immediately. To make the code valid, you need to stop the debug session, and choose Make and Download and Debug. To simplify this, IAR Embedded Workbench provides a Make & Restart Debugger button.
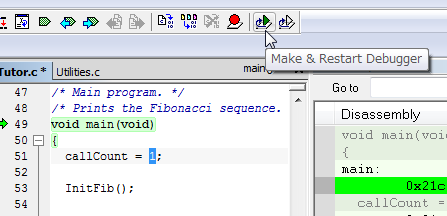
When you click the button, the debug session will stop, make will run, and the debug session sequence will be restarted. You can skip several manual operations and your trial and error process will be much more convenient.
Choosing to Download and Debug or to Debug without Downloading
To start a debug session, there are two buttons available in the toolbar of the IAR Embedded Workbench IDE.
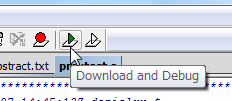

When you choose Download and Debug, the C-SPY Debugger will download the executable data to Flash or RAM and load the debug information in C-SPY. It is always safe to use this option to debug a built object.
Debug without Downloading skips downloading the data to the target device memory and directly loads the debug information. You can use this option to restart the debug session if there are no changes in the executable data. This way, you save time by skipping the unnecessary download step. Only use Debug without Downloading if you are sure that there are no changes in the built object. Otherwise, the debug information in C-SPY could be incorrect, for example showing the wrong corresponding source code.
Choosing Make or Rebuild All
To generate an executable file or library file, you choose Project>Make or Project>Rebuild All.
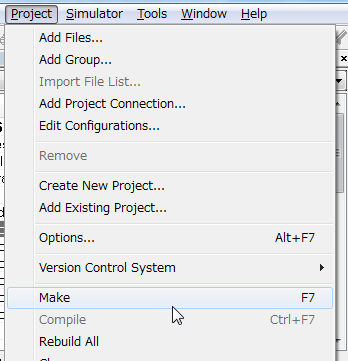
Rebuild All cleans the pre-compiled objects, then recompiles and relinks all files. Make compiles, assembles and links only the files that have been changed since the last build.
We recommended you to always choose Rebuild all in cases when you have changed header files or build options such as compiler optimization settings. If you are working with one or a few source code files, choose Make instead and that will shorten the build time. The amount of time you can save increases with the amount of source code you have in your project.
Using Auto Indent
Indenting is not a mandatory rule for C/C++ language. Compilers generate the same source code even if there is no indent in the code. However, for programmers, indentation is important to see the code block and the hierarchy and nest of the code.
If you paste source code from different projects, the indent policy might be different. You could of course fix it manually one by one, but there is a useful command to do it for you.
Select the range of code to fix and choose Edit >Auto Indent.

This will fix the indentation of the selected code:
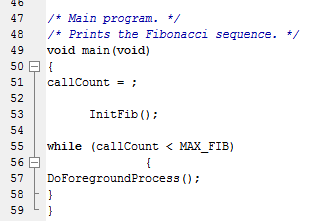
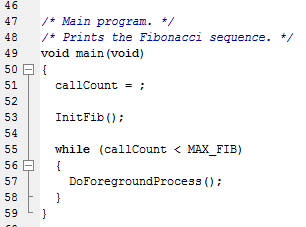
Even if you are not reusing code but simply prefer to concentrate on writing it, you can do that first and run Auto Indent on the written code later.
Using Block Comment
When you debug your project, you might write small test code blocks and switch between enabling and disabling them. There are several ways to switch code blocks between active and inactive. For example, you can use #if #endif directives or /* */ style comments. However, using #if directives reduces the code readability and /* */ style comments do not allow nested usage. The solution is using // style comments instead, and if you use Block comment, you don't have to add // for each line.
Select the code block and choose Edit > Block Comment.


You can also Block Uncomment for a commented code block. Easily controlling if a piece of code is active or inactive is especially useful when debugging.
Using Shortcut Keys
As most software does, the IAR Embedded Workbench IDE offers many useful keyboard shortcut keys that can increase your development efficiency. Of course, there are some general shortcuts such as [Ctrl+C] for copy and [Ctrl+V] for paste. There are also tool-specific shortcuts such as [F7] for Make and [Ctrl+D] for Download and Debug. To find useful shortcut keys, you can start from the menu display.
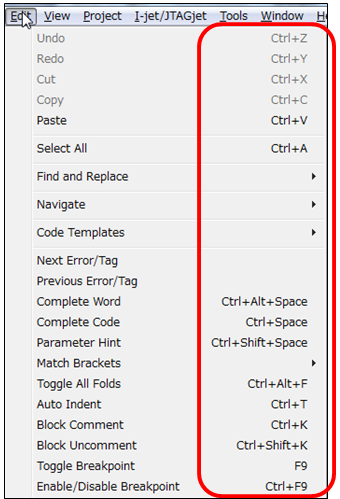
Find the commands you often select, and remember their shortcut keys listed on the right side.
We would also like to highlight two specifically useful shortcut keys that you might not be aware of yet. If you want to see the definition of a function, for example GPIOInit() in this image, focus the cursor on the function and press [F12].
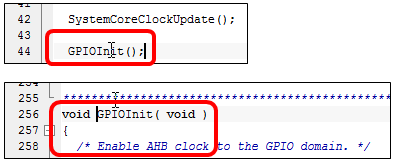
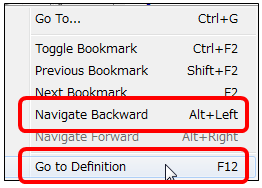
You will jump to the definition of that function. [F12] is assigned to Edit>Navigate>Go to Definition.
Another useful shortcut is [Alt+Left] that lets you step back to your previous location in the source code. This is actually the same shortcut that is being used in many internet browsers to go back to a previous page.
To get an overview of available shortcut keys in the IAR Embedded Workbench IDE, choose Tools>Options>Key Bindings.
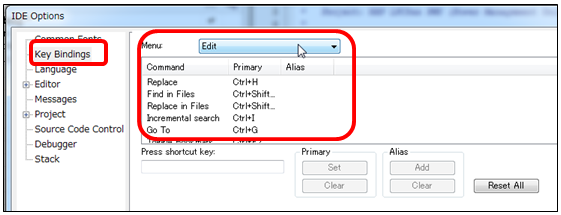
Here, you can see the current shortcut keys and you can also customize the shortcuts by simply assigning keys to commands.
Enabling Parallel Build
We recently launched the feature Parallel build in order to speed up build times, and it is now being rolled out in IAR Embedded Workbench for different targets. Nowadays, most Windows computers have multicore CPUs. Parallel build enables you to efficiently use the processors for the build processing. To activate Parallel build, choose Tools>Options.
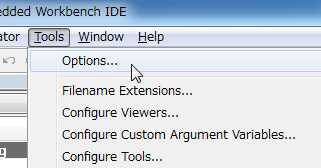
Select the Project category and check Enable parallel build.
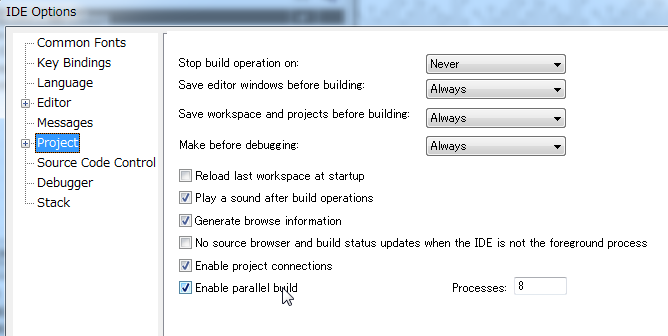
For Processes, enter the number of cores available in your computer. The following chart shows a comparison of the actual build times for an example application:
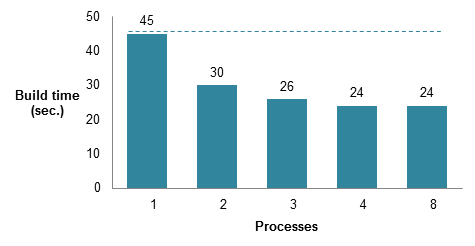
The computer we used for this example has four CPU cores. As you can see, running in four processes works with almost double speed compared to running a single process. There is no difference in build times between selecting four processes and eight processes here since four is the number of cores available.
We recommend you to always enable Parallel build if it is available in the version of IAR Embedded Workbench you are running. Shorter build times let you build and test your application more times a day.